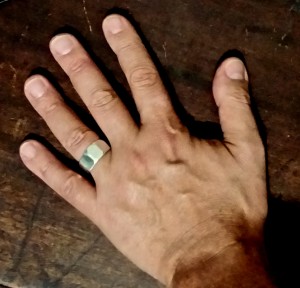
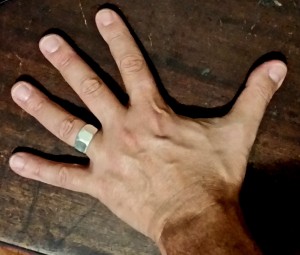
A few weeks ago I wrote about the life changing adjustment that moved my pinky finger in line with the outer edge of the palm.
Shifting my pinky finger about a half of an inch supports my head neck and shoulders any time I am weight bearing through the arms.
More interesting that how effective this change is, is the fact that I never thought of doing it before, nor had it been taught to me.
And teaching it rather obsessively for the last couple of months has been equally interesting.
Some students hear something once and the next time they come to class the pinky’s have a new alignment.
Some students take a while longer and I am still waiting on a few to take up the challenge.
Of course I could be wrong and they resistant ones correct but that’s the fun part isn’t it?
Today I’d like to talk about a similar adjustment that I have made with my thumb.
The pictures above are my old hand position and my new hand position. They feel radically different.
I teach experientially as often as I can.
The is some value to my endless blathering but if I can show you a way to feel something I usually think it is more effective.
In the post and video about the pinky (links above) I used the palpation of the triceps muscle to illustrate the difference between the two different pinky positions.
For the thumb we can use the exercise in the video below that I use to teach about the ideal engagement of the hand.
Unfortunately the video—which I will be remaking—shows you the wrong way to spread the finger though it offers the correct way to engage the fingers to the midline.
What you want to try is rolling the finger nails to the midline as I do in the video using the two different hand positions in the pictures at the top.
The difference to me is palpable.
Put your free hand over the forearm of the hand on the floor or mat and feel the different ways the muscles of the forearm reacts to the engagement of the fingers.
***


