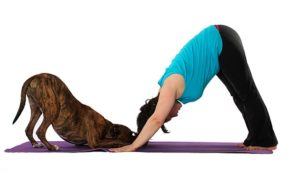
Changing Your Hands in Down Dog Pose

Down dog pose is a ubiquitous piece of most yoga practices and students are very often left to their own devices when it comes to its alignment.
There are many different approaches taught by teachers. I have always favored a fairly close alignment of the legs yet in taking classes lately almost every teacher wants me to keep my feet wider apart and, in doing so, I can’t really complain. It makes life easier for one thing and it is respectful to do what teachers ask of me.
As a teacher, one of the aspects of down dog pose that I focus a lot of attention on is the weight distribution in the hands and feet.
In down dog pose students tend to let the weight fall to the outside of both the hands and feet. Focusing on the hands for this post the majority of people in most classes let their weight fall to the outer heel of the palm.
This tends to flatten the entire heel of the palm, which allows the carpal tunnel to be compressed into the mat.
Ideally, energy should be spread through the whole hand with both carpal tunnel and the center of the palm lifted off of the floor.
To accomplish this it is important to employ the technique I show in the short video at the top of the post.
I show this finger work from my hands and knees and you can work on it this way before doing it in down dog pose.
It isn’t necessarily difficult to do but it won’t happen consistently without focusing on it for a while. This is how I build my practice. Pick one thing at a time and obsess until it becomes part of my muscle memory. Of late, I have been working on external rotation of the upper arms in down dog pose.
Finger Action in Down Dog Pose
- Start on your hands and knees and look at your fingers.
- There is a tendency for the fingernails to roll out towards the pinky finger of the hand, and for the heel of the palm and the center of the palm to be flat to the floor.
- Starting with the index, middle, ring, and pinky fingers, roll the nails to point straight up to the ceiling. They will all be rolling toward the index finger
- Do the same thing with the thumbnail but the odds are it won’t point straight up. The thumbnail will also be rolling towards the index finger.
This action should pop the center of the palm up and create space beneath the carpal tunnel which is what you want any time the palms are on the floor.